History of Photography
Camera Obscura
|
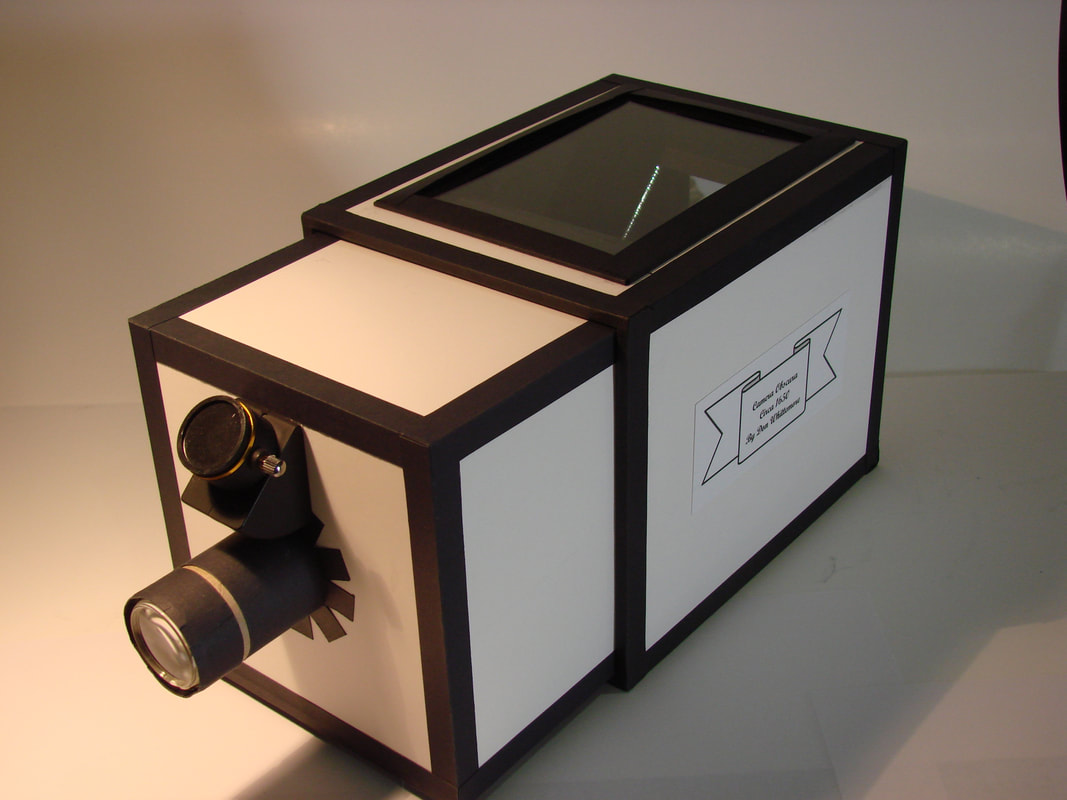
Camera obscura is a darkened room with a small hole on one side where whatever is on the other side is projected onto a surface, opposite to the hole.
From the 17th century onwards it was used as an aid to plotting compositions. |


To make the camera we had to fold four pieces of card, black on the inside, white on the outside, into a square. We then cut a small square into another piece of black cardboard and stuck it onto one end of the box.
To achieve the focal length, we had to stick a square of tracing paper onto the end that didn't have the black card.
Finally, we attached a lens above the square we cut out to adjust the focus and make it clearer.
To make the drawing, we positioned the camera obscura to look outside the window of the classroom and drew onto the tracing paper, being careful not to move the object.
DSLR Introduction
|
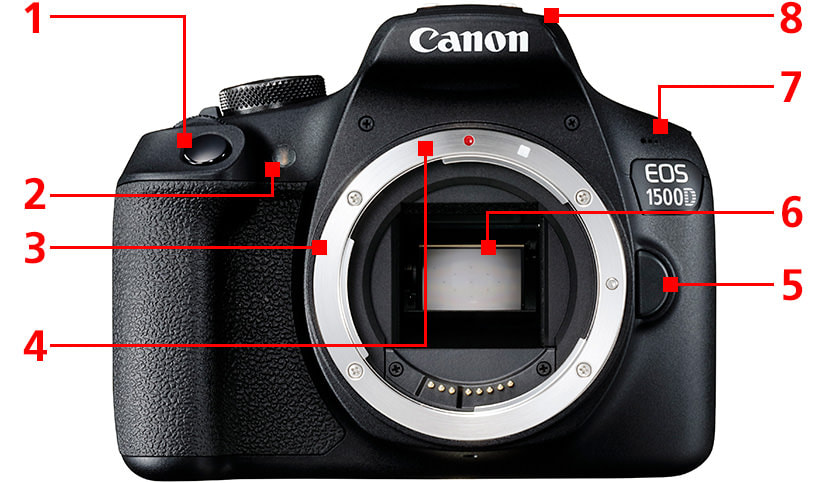
1. Shutter button
2. Red-eye reduction/self timer lamp 3. Lens mount 4. Lens mount index 5. Lens release button 6. Mirror 7.Microphone 8. Built in flash |
|
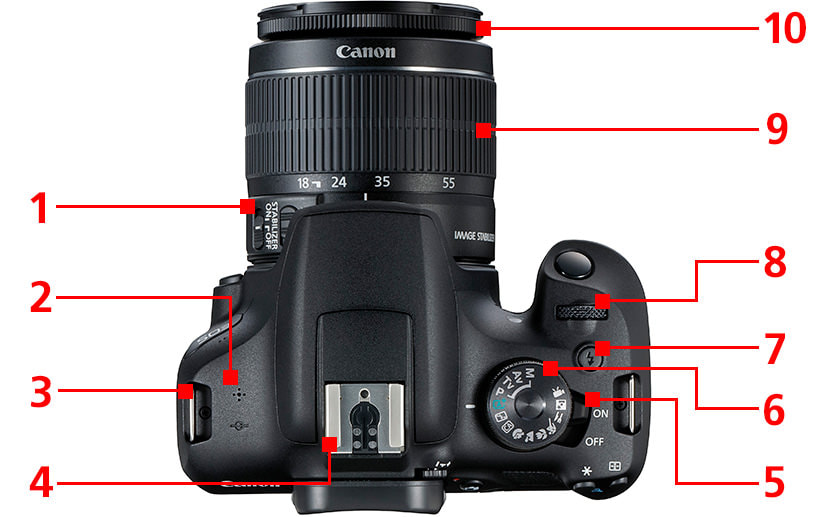
1. Focus mode switch
2. Speaker 3. Strap mount 4. Hot shoe 5. Power switch 6. Mode dial 7. Flash button 8. Main dial 9. Zoom dial 10. Focus ring |
|
|
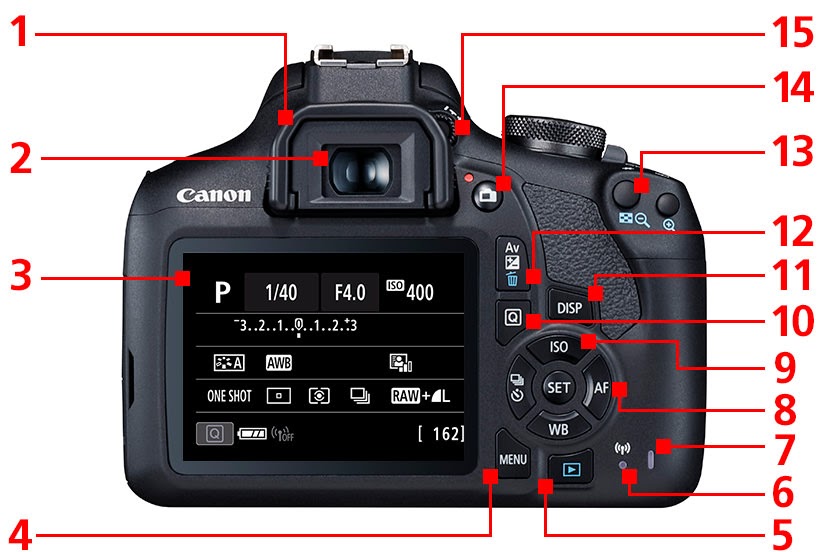
1. Eyecup
2. Viewfinder eyepiece 3. LCD monitor 4. Menu button 5. Playback button 6. Wifi lamp 7. Access button 8. Set button/Multi controller 9. ISO speed setting button 10. Quick control button 11. Display button 12. Erase button 13. Focus point selection button 14. Live view shooting/Movie shooting switch 15. Dioptric Adjustment knob |
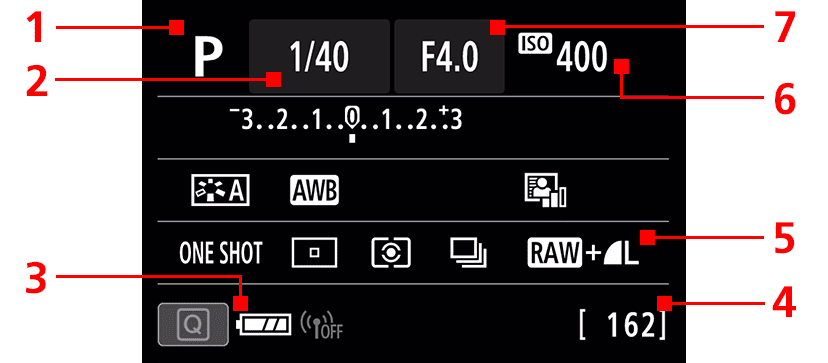
|
1. Shooting mode
2. Shutter speed 3. Battery level 4. Shots remaining 5. Image recording format/Quality 6. ISO speed 7. Aperture value |
|
My First Photographs
These were the setting my camera were on when taking my first pictures:
My ISO sensitivity was on 400
My program mode was on TV, or known as shutter speed priority
My shutter speed was 1/60th of a second
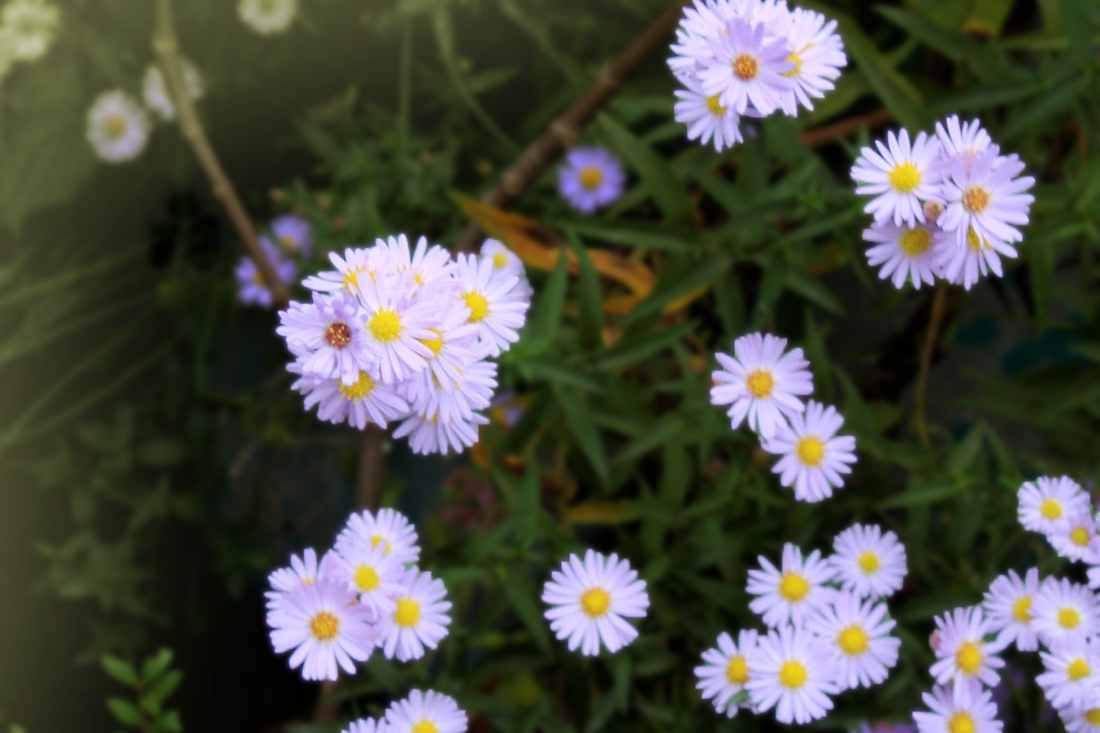
The photographs we were told to take was manmade vs natural.
I find keeping the focus still as I click the button difficult, and getting small objects as the focus is also difficult.
My ISO sensitivity was on 400
My program mode was on TV, or known as shutter speed priority
My shutter speed was 1/60th of a second
The photographs we were told to take was manmade vs natural.
I find keeping the focus still as I click the button difficult, and getting small objects as the focus is also difficult.


Best edits

|
|
Shutter speed
Shutter speed is the amount of time the shutter on the camera is open, it's measured in fractions of seconds and when we were doing this project the camera mode must be on TV

Iso: 400
|

Iso: 400
|

Iso: 400
|
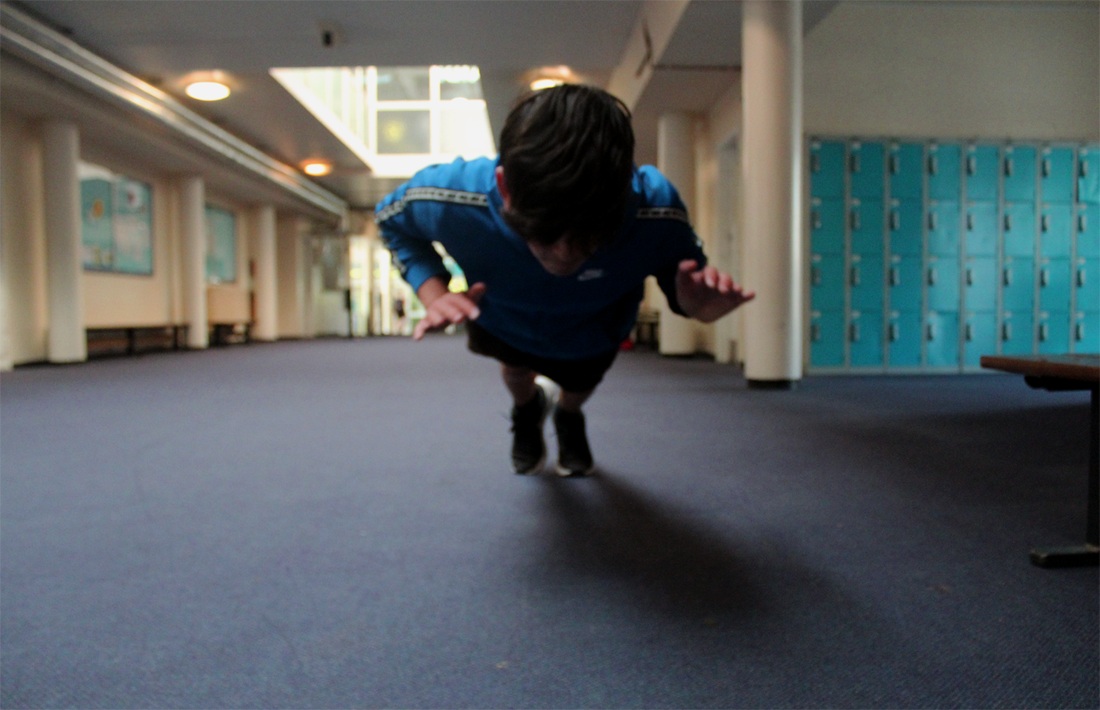
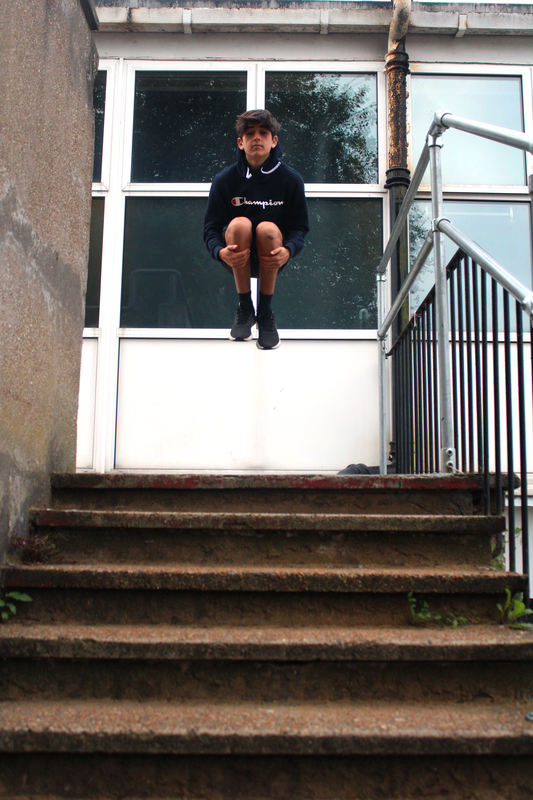
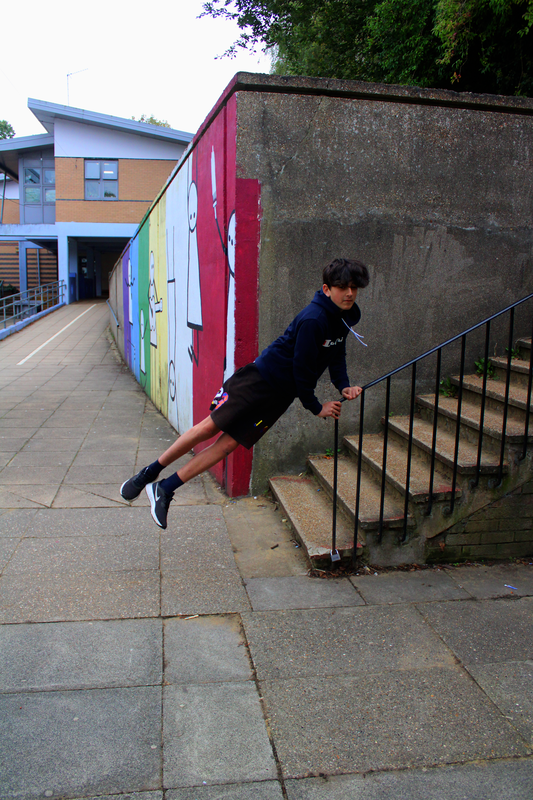
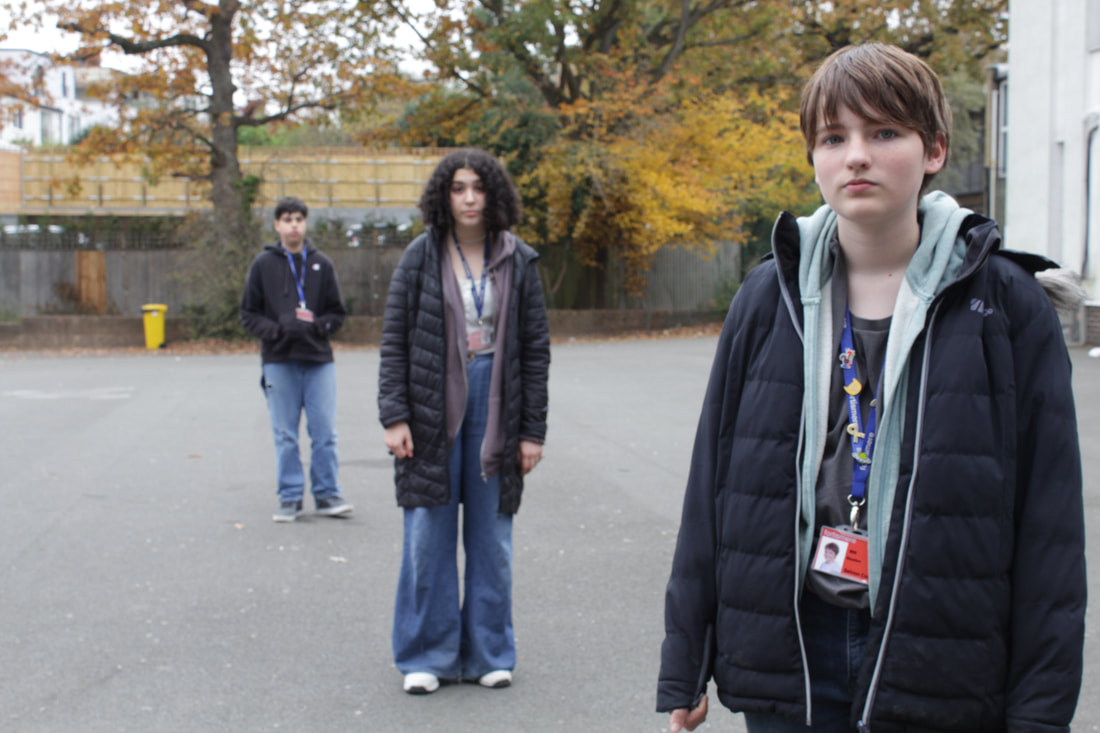
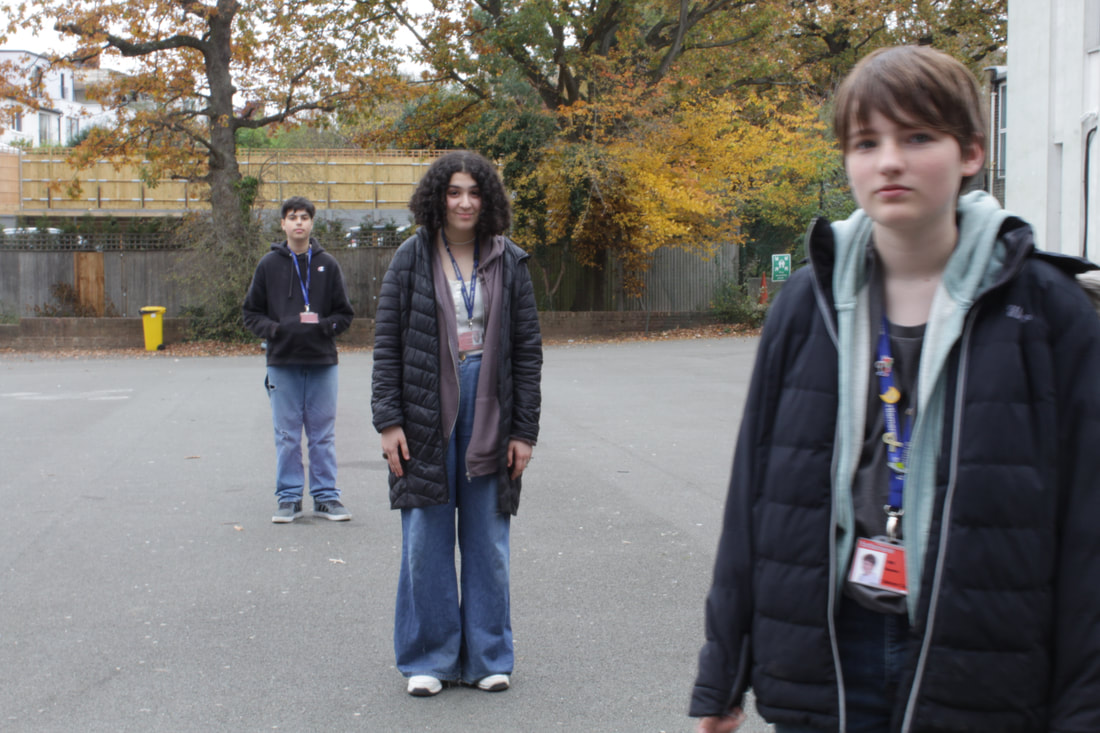
Levitation
The task was to make the shutter speed very short, that way when we jumped it would appear that we were floating.
Yowa Yowa
|
|
We used Yowa Yowa's work for inspiration, she takes a picture diary of her day to day life... But levitating!
see left |
My response
|
|
To create a succesful levitation image we had to take the picture at just the right time, pose well and ensure the background was suitable for the desired result. |
Edits
|
|
The ISO is 800 for the top two and we made sure to go somewhere there wasn't direct sunlight. We changed the shutter speed depending on where we were, for inside we were forced to raise the iso to 1600 to get a reasonable shutter speed for the project at hand.
I feel as though I could have done better focusing and a few of the pictures have worse quality because of it, but the timing of when we took the pictures was very good and we got some impressive shots.
If I had to give tips I would recommend using a prop as it adds realism to the picture and make sure your arms and face are relaxed, the background is also important to make it look real.
Homework: Levitation Images
Edited
WWW:
I got a few good images with the camera I had access to, and it was still enough to give the illusion of suspension
EBI:
I could manage to do it by myself with a timer, and get better background to do it in front of
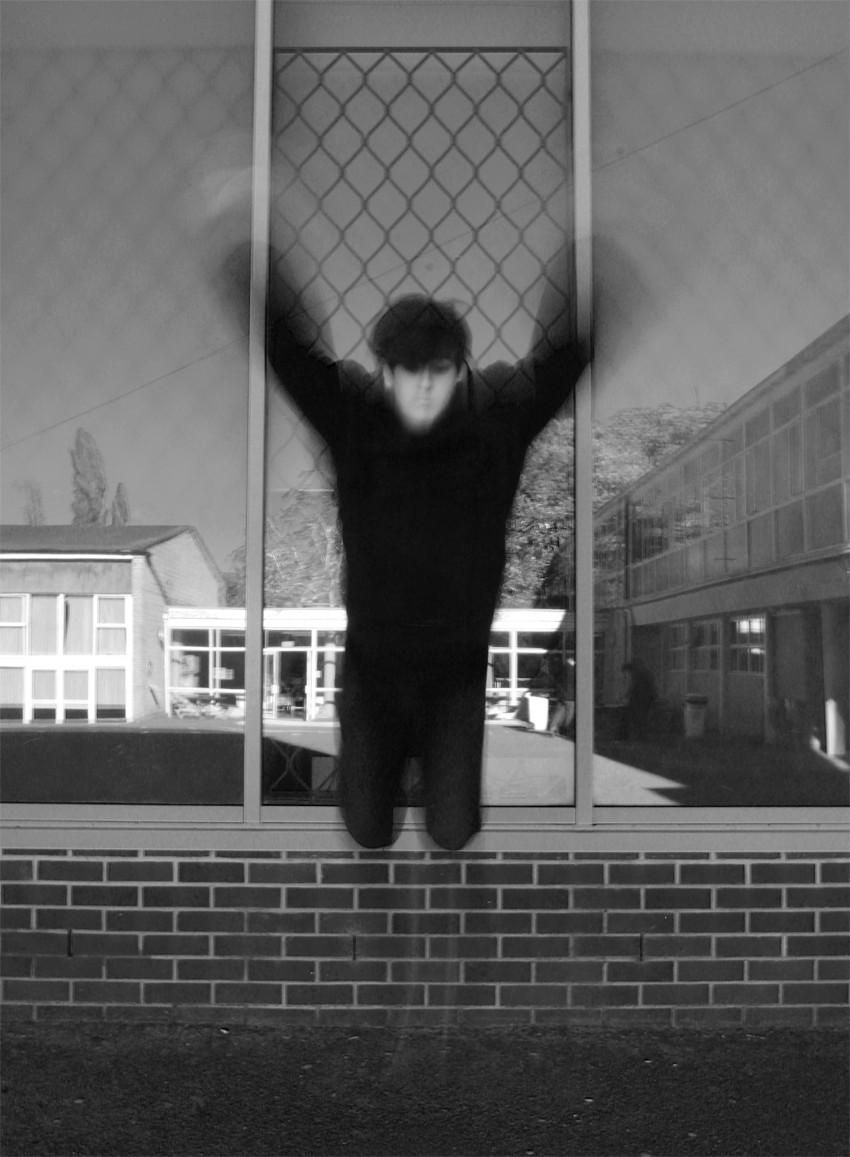
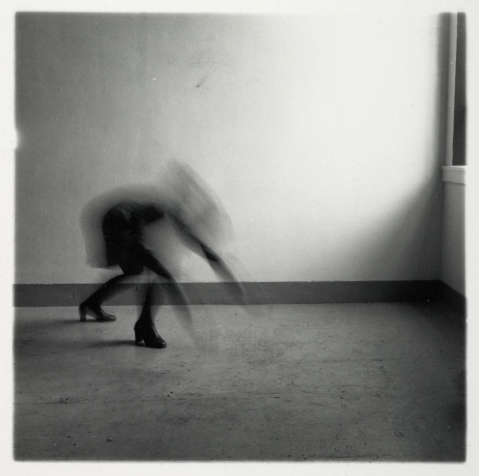
Blurred Movement
Edited image
|
Here I changed image size, made it black and white, changed the black and white colour scale, then cropped it and rotated it properly
|
|
WWW:
I found good background for my pictures and managed to time the shots at just the right time
EBI:
I could have made sure that Rohan was in focus during the first few photos, I also should have held the camera more still during the photos as some of them were blurred
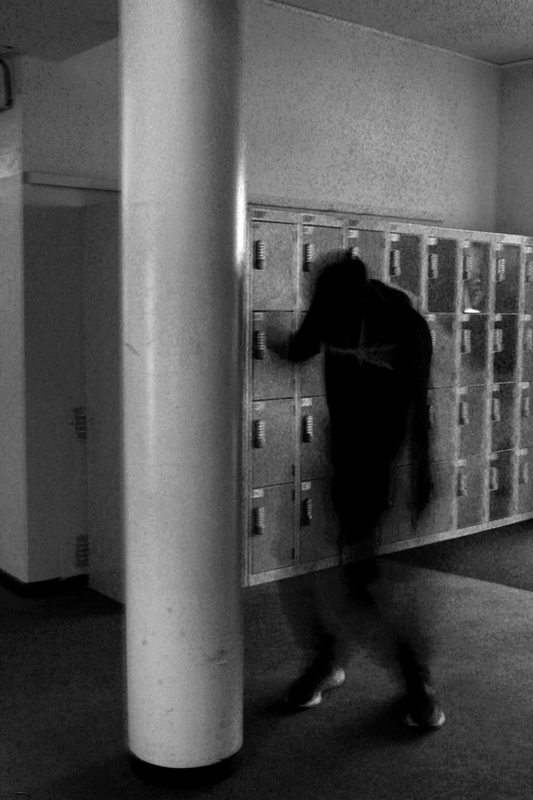
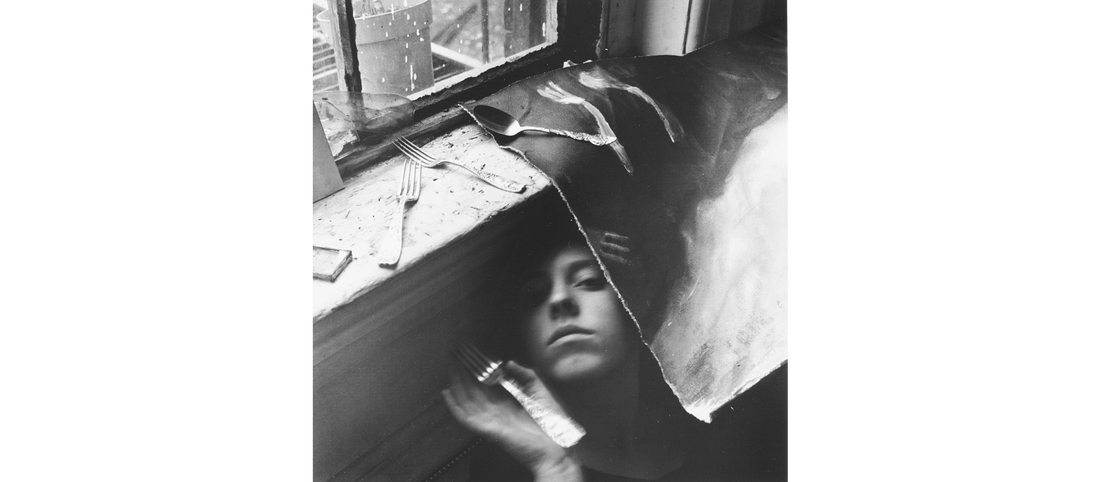
Blurred Image 2 (Francesca Woodman inspiration)
Edited
|
First I resized the image, then changed it to black and white, and then changed the colour scale on the black and white, and then change the levels.
|
|
WWW: I took inspiration from Woodman, and got a good background with colours and lighting
EBI: I could have taken more images with less blur (used a tripod)
EBI: I could have taken more images with less blur (used a tripod)
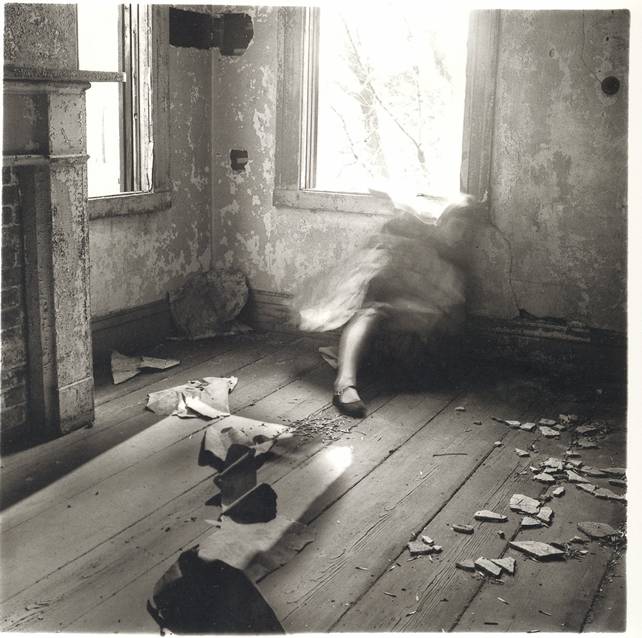
Francesca Woodman
In our next pictures we will take more inspiration from Francesca Woodman and her work in blurred images

|
1977-1978 - Self portrait with chair
1979 - It must be lunch now |
|
1976 - House #3
|
|
Francesca Woodman
Providence, Rhode Island 1975-78 Francesca Woodman intended to make an intimate connection between viewer and image. She did this by blurring her figure and face. She wanted to create our own representation of a person and relate to our own personality. Woodman is considering the body and the male view in this piece of work. This is shown by the only thing that is in focus being her heels, which is generally associated with female beauty and something inherently feminine. Woodman used a plain background to create this work.This helped her to direct the viewer’s full attention to her figure and imprint the swaying picture of her, making it uncanny and uncomfortable as there is nothing else to look at. This helps her all in all to put certain ideas into the viewer’s head and make a successful picture. |
Aperture

The aperture is the size of the hole that light travels through to get to the camera (the opening of the lens), so it controls how much light enters the camera. The longer it is open, the more light will enter and the more of the photo will be in focus, and same goes for the other way around.
The effect that it has on the picture is the depth of field, which is how much distance of the picture is in focus. It can either be: shallow or extensive. This can create some interesting photos, focusing on individual things and making out of focus specific things, influencing the view of the photo.
The effect that it has on the picture is the depth of field, which is how much distance of the picture is in focus. It can either be: shallow or extensive. This can create some interesting photos, focusing on individual things and making out of focus specific things, influencing the view of the photo.
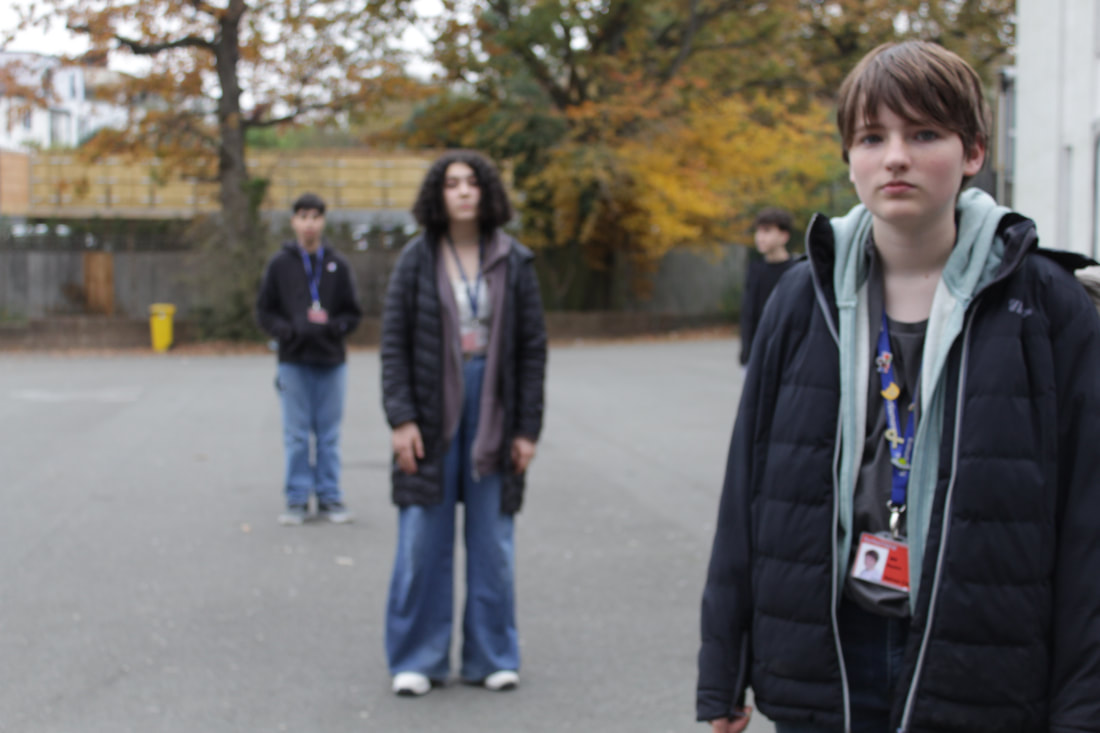
Aperture: 4.5
Shutterspeed: 1/60 ISO: 200 |
Aperture: 9.0
Shutterspeed: 1/15 ISO: 200 |
Aperture: 29.0
Shutterspeed: 1/2 ISO: 200 |
Set 2

Aperture: 4.5
Shutterspeed: 1/400 ISO: 400 |

Aperture: 9.0
Shutterspeed: 1/400 ISO: 400 |

Aperture: 14.0
Shutterspeed: 1/80 ISO: 400 |
WWW: We had good inspiration and ideas, and we managed to demonstrate an understanding of aperture
EBI: Focus improvement, more pictures
EBI: Focus improvement, more pictures
Making GIFs
Edweard Muybridge


|
Edweard Muybridge's lifes work was to discover the truth about motion, he wanted to discover once and for all if at any point in a horse's gallop all four hooves left the floor. He essentially made a series of tripwires that triggered cameras, taking photos as a horse racer was racing.
|
First GIF
|
To make the gif we uploaded the files into a stack, made it into a gif through the animation setting, reversed it and changed the time between gifs. I then made a mask for all of the frames and changed the levels to make the colour balance and colours better, I then exported it as a gif and put it onto weebly.
|
|
WWW: The first attempt at making a gif went ok for my group, although we had some jumps where the camera was positioned weirdly, it was a good first attempt.
EBI: We did manage to capture the basic idea of travelling without moving which was the aim of the project.
EBI: We did manage to capture the basic idea of travelling without moving which was the aim of the project.
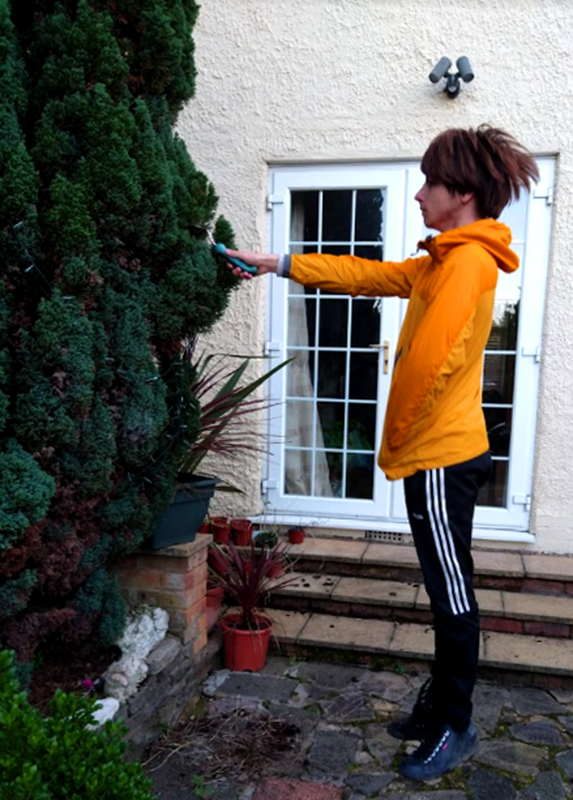
Final GIF
For this gif we gave it a more creative side, and had the idea of using a jacket, then the subject turning into the jacket, for this I had to edit out myself as I ran away from the jacket. We developed the idea of travelling without moving and gave an idea/plot behind it. All of this inspired by Edward Muybridge.
